
Whether you’re remodeling your home or building a new space, understanding drywall installation is a game-changer. Drywall, also known as Sheetrock, is a staple in modern construction, providing smooth, durable walls and ceilings. But if you’ve never handled a drywall screw or worked with a drywall lift, the process can seem intimidating. Don’t worry, you’re in the right place. This guide breaks down drywall installation into clear, manageable steps that both beginners and pros can follow, helping you hang drywall efficiently and achieve professional results.
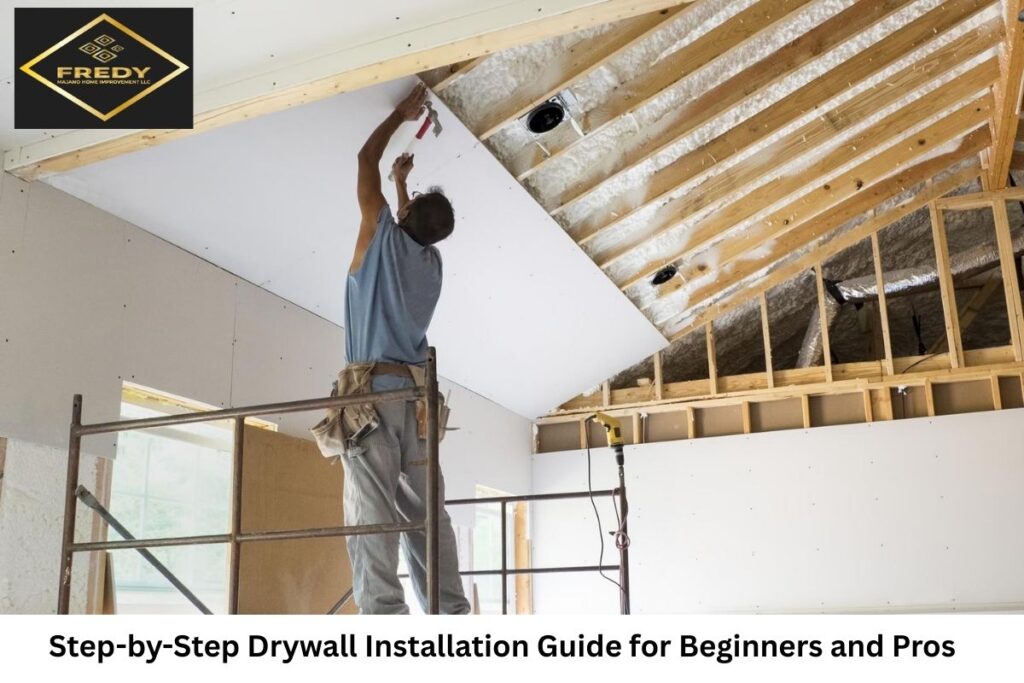
By the end of this guide, you’ll know how to cut drywall, install sheetrock, finish drywall seams, and even tackle a drywall ceiling without breaking a sweat. Plus, we’ll explore the tools and techniques that make the job smoother and faster, whether you’re working alone or with a team. Ready to transform your walls? Let’s dive in.
Understanding Drywall Basics Before You Start
Before you grab your drywall tools, it’s crucial to understand what you’re working with. Drywall is composed of gypsum sandwiched between thick sheets of paper. Its versatility makes it ideal for walls, ceilings, and even decorative surfaces. Knowing the types of drywall, standard, moisture-resistant, fire-rated, and soundproof, can save you headaches later.
Drywall studs also play a critical role. These vertical or horizontal framing members provide the support you need to hang drywall properly. Whether you’re installing a new wall or replacing an old one, inspecting and reinforcing studs ensures your sheets won’t sag or crack over time.
Key points to remember:
- Drywall comes in standard 4×8 and 4×12 sizes, as well as specialty sizes.
- Drywall studs should be spaced 16” apart for walls and ceilings.
- Check for moisture or damage in existing studs before installing sheetrock.
Gathering Your Drywall Tools
No successful drywall installation happens without the right tools. A well-prepared workspace can drastically reduce mistakes and improve efficiency. Essential drywall tools include a drywall lift for ceilings, a T-square for cutting, a utility knife, drywall screws, a screw gun, and joint compounds.
For beginners, investing in a drywall lift may seem excessive, but it’s a lifesaver for heavy sheets, especially when working on ceilings. Professionals often prefer cordless screw guns to quickly secure drywall screws without slowing down.
Must-have drywall tools:
- Drywall lift (for ceilings)
- Screw gun or drill with a drywall bit
- Utility knife and T-square
- Drywall tape and joint compound
- Sanding block or pole sander
Measuring and Cutting Drywall Like a Pro
Accurate measurements are the backbone of a flawless drywall job. Begin by measuring your walls and ceilings precisely, noting electrical outlets, windows, and other obstacles. Once you have your measurements, use a T-square and utility knife to cut drywall. Always score the paper first, then snap the sheet along the scored line to avoid jagged edges.
Cutting drywall for ceilings may require a helper or a drywall lift. Remember, small errors in cutting can turn into large gaps later, so double-check every measurement. Professionals often mark cuts clearly on the drywall face to reduce mistakes.
Tips for cutting drywall:
- Score lightly first, then snap to prevent cracks.
- Always measure twice and cut once.
- Use a drywall rasp to smooth rough edges.
Hanging Drywall Efficiently
Now comes the fun part: hanging drywall. Start with the ceiling if you have one. Use a drywall lift to position sheets flush against the ceiling joists. Secure each sheet with drywall screws, keeping them about 12 inches apart on walls and 8 inches apart on ceilings.
When hanging drywall on walls, start from the top and work downward. Align the edges carefully with studs, and avoid over-tightening screws, as it can damage the drywall surface. Professionals often stagger seams between sheets for added strength.
Pro tips for hanging drywall:
- Use a drywall lift for ceiling sheets to prevent injuries.
- Check for level alignment with a laser level or spirit level.
- Stagger seams to avoid weak lines across the wall.
Securing Drywall Seams and Joints
After hanging your sheets, focus on drywall seams. Use drywall tape to cover joints, then apply a thin layer of joint compound over the tape with a trowel. Let it dry, then sand it smooth. Repeat the process for a seamless finish.
Corners require special attention. Use corner beads to reinforce external edges and prevent chipping. With a bit of patience, your drywall seams will be invisible once painted, giving your project a professional look.
Drywall seam tips:
- Apply two to three coats of joint compound for a smooth finish.
- Sand lightly between coats to remove ridges.
- Use a damp sponge to smooth edges before painting.
Installing Drywall Ceilings Like a Pro
Drywall ceilings can intimidate even experienced DIYers. Using a drywall lift is a game-changer, but teamwork is key as well. Start by lifting the sheet into position, then screw it into the ceiling joists using drywall screws. Make sure the studs properly support the edges to prevent sagging.
Suppose your ceiling has fixtures or vents, cut openings before hanging the sheet. Professionals recommend keeping sheets running perpendicular to joists for extra strength. Once installed, treat seams as usual with tape and joint compound.
Ceiling installation tips:
- Use a drywall lift for heavy sheets.
- Keep screws 8” apart on ceilings.
- Mark openings for lights or vents before installation.
Finishing Touches: Sanding, Priming, and Painting
The final step in drywall installation is finishing. After your joint compound dries and seams are sanded smooth, apply a coat of primer. Primer ensures paint adheres evenly and hides any remaining imperfections. Then, you’re ready to paint or wallpaper your freshly installed drywall.
Don’t rush the sanding process; uneven seams or screw dimples can become visible after painting. Using a pole sander or sanding block allows for precise control and a flawless finish.
Finishing tips:
- Sand lightly between coats of joint compound.
- Apply a high-quality primer before painting.
- Inspect for tiny dents or gaps before finishing.
Essential Safety Tips and Pro Advice
Drywall installation can be physically demanding. Always wear protective gear such as safety glasses, gloves, and dust masks to protect against debris and dust. Lift sheets carefully and avoid overreaching when working on ceilings.
For pros and DIYers alike, organizing your workspace makes a big difference. Keep screws, tools, and cut drywall sheets nearby but out of walkways. A clean, organized environment reduces accidents and speeds up your workflow.
Safety tips:
- Use a dust mask when sanding.
- Avoid over-tightening screws to prevent cracking.
- Keep tools organized for efficiency.
Final Thoughts
Drywall installation doesn’t have to be overwhelming. By understanding the tools, techniques, and best practices, you can hang drywall, secure seams, and finish walls with confidence. Whether you’re a beginner tackling your first project or a pro refining your skills, following a step-by-step approach ensures strong, smooth, and professional-looking results.
For more expert guidance on drywall installation, visit Fredy Majano and check out detailed tutorials at Drywall Installation. With practice and patience, drywall installation can be not just manageable, but enjoyable.
FAQs
Q1: What tools do I need for drywall installation?
You’ll need a utility knife, T-square, screw gun, drywall screws, drywall lift (for ceilings), joint compound, tape, and a sanding block.
Q2: How do I hang drywall on ceilings without help?
A drywall lift is essential for positioning sheets. Secure the sheet to the joists using screws, then finish seams as usual.
Q3: How far apart should drywall screws be?
For walls, place screws about 12 inches apart. For ceilings, 8 inches is recommended to prevent sagging.
Q4: Can I install drywall myself?
Yes, but tools like a drywall lift and careful planning make solo installation much safer and easier.
Q5: How do I finish drywall seams?
Apply tape over the joints, cover with joint compound, let dry, sand, and repeat for two to three coats for a smooth finish.